Festive Foodie: Gingerbread Snaps with Cream Cheese Filling

Good Morning and Happy Wednesday, everyone!

I’m in a lovely mood. Not only did I take today off from work to prepare for tonight’s Boston Music Awards (and got to sleep in a little later than usual in the process,) but last night I had the most fun taking ugly Christmas sweater photos with my favorite person in the world for my 2019 holiday cards- and somehow my little town successfully managed to dodge an impending overnight snowstorm- getting by with only a little bit of rain in the early morning hours today!

So while I sit here, sipping a coffee and planning on doing some errands and Christmas shopping this morning and early afternoon before it’s time to make my way into Boston- I thought I’d share a baking endeavor I undertook earlier this week when a craving for gingerbread hit me.

Despite not being 95 years old, I actually love ginger snap cookies- and I knew of a way to make them a bit more festive for this time of year.
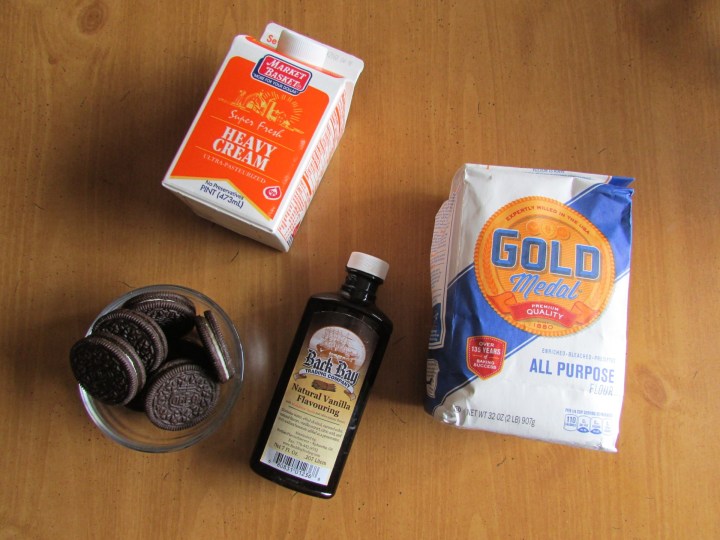
WHAT YOU’LL NEED:

FOR THE COOKIES:

  • 2⅓ cups all-purpose flour
  • 2 teaspoon ground ginger
  • ¾ teaspoon ground cinnamon
  • ¾ teaspoon baking soda
  • ¼ teaspoon salt
  • ¾ cup unsalted butter, softened
  • 1 cup brown sugar
  • 1 large egg
  • 1 ½ teaspoon of vanilla extract
  • ¼ cup molasses

CREAM CHEESE FROSTING:

  • ½ cup unsalted butter, softened
  • 4 ounces cream cheese, softened
  • 2-3 cups powdered sugar

READY? HERE’S WHAT YOU DO:

  1. Preheat the oven to 350°F degrees. Line baking sheets with parchment paper or silicone baking mats.
  2. In a medium bowl sift together the flour, ginger, cinnamon, baking soda and salt.
  3. In a large bowl beat together the butter and sugar until fluffy. Beat in the egg, vanilla and molasses.
  4. With the mixer on low speed, beat in the flour mixture about ½ at a time.
  5. Form the dough into balls about 2 tablespoons in size. Place 2 inches apart on prepared baking sheets. Press the dough balls flat to increase crispiness.
  6. Bake for 8-10 minutes, or until the tops are set.
  7. In a large bowl beat the butter and cream cheese together using an electric mixer.
  8. With the mixer on low speed, beat in the powdered sugar about ½ – 1 cup at a time until you’ve mixed in 2 cups.
  9. Beat in the cream 1 tablespoon at a time, alternating with a little extra powdered sugar until the desired sweetness and consistency.
  10. Frost the cooled cookies using a flat knife and apply another flattened cookie on top to form the sandwich shape.

From there, I usually stick the completed cookies in the refrigerator for an hour or so to harden up the cream cheese and make them prime for dunking in cocoa- but you can indulge however you’d like!

I’m off to get some errands done and make myself look presentable for tonight- but I’ll be back on Friday morning with more festive content as the holidays creep closer and closer!

Wish Indie617 luck for the BMAs- and enjoy your “Hump Day,” everybody!

xx

– Ashley –

Fall Foodie: 5-Ingredient Red-Wine Cranberry Sauce

Good Afternoon and Happy Friday, everyone!

Today’s post is coming at you all a little later than usual (I’m an early bird, after all)– but for good reason. The last Friday before Thanksgiving is always a little crazy at my job since so many people are on vacation next week and it’s sort of a mad dash to get those last minute loose ends and cases wrapped up before the office is a ghost town for a few days.

I’m powering through a lengthy “To Do” list today, but that also includes sharing a quick, easy, delicious- and crowd-friendly side dish recipe for next week’s festivities! If you like citrus, and if you like red wine- then you’re going to love and appreciate this recipe for cranberry sauce!

WHAT YOU’LL NEED:

  • One 12-ounce package cranberries
  • 1¼ cups sugar
  • 1 cup dry red wine
  • 1 orange
  • 1 cinnamon stick

READY? HERE’S WHAT YOU DO:

  1. In a medium pot, toss the cranberries and sugar to combine. Pour the red wine over the cranberries and heat over medium heat.
  2. Peel the zest away from the orange with a vegetable peeler and add it to the pot. Cut the orange in half and squeeze the juice into the pot.
  3. Add the cinnamon stick and bring the mixture to a simmer over medium heat. Reduce the heat to low and simmer, stirring occasionally, until the cranberries burst, 10 to 15 minutes.
  4. Cool the mixture to room temperature before serving.

This makes about ten servings, so if you need to adjust the measurements to better accommodate a smaller/larger crowd- feel free! And I recommend making a little extra, anyway- since it tends to go quickly whenever I serve it!

With the holiday next week, the posting schedule here on ‘Blondie Birdie’ is going to be a little different- with content up on Tuesday, Thursday (before I head out to have dinner with my family!) and on Saturday when I wrap up this past November and prepare for the final month of 2019.

I’ll see you all then! Enjoy your weekend!

xx

– Ashley –

Pre-Easter Prep

Good Morning and Happy (Good) Friday, everyone!

I’m not a particularly religious person. My family, rooted in Catholicism since way back when- have grown considerably more lax in our religious beliefs than say, my grandparents or my great-grandparents were in their day. While Easter was all about God and Jesus and uncomfortable, overly-starched frilly dresses or suits for my parents when they were little- they’ve thankfully raised my brothers and I to just make it all about food, fun, and being with family.

A holiday I can get behind, really!

This weekend- which will be spent at my mother’s house- is going to be a bit chaotic, to say the least. In-between all the cooking, cleaning, and decorating- I’m also taking on the responsibility of picking up and bringing back family members who reside way up North in Vermont- more than a few hours away. I don’t mind, since it’s a lovely drive and Spring has sprung and all- but it’ll take place in-between my gig at Indie617 on Saturday and work obligations on Monday.

Needless to say I’m going to need one serious power nap come Monday afternoon/evening- but I’ll cross that bridge when I get to it. For now, I’m just excited to see my family again before my big move next month! It’s going to be a bit time consuming and hectic around that time- so I’m looking forward to the calm before the storm where I can eat, drink, laugh and catch up with cousins, aunts, uncles, etc.

I’ve got some fun photos, re-caps, and my “Monthly Favorites” to share next week when I return to Blondie Birdie bright and early post-holiday on Monday morning- but I’ve got some handy links for those of you who are still getting your Easter breakfasts/brunches/dinners together that I hope will help!

That just about does it for me this week. I’ve got to get going at work and get ready for some plans I have later on today/tonight out in Western Massachusetts.

I hope you all have a fun, safe, candy-filled Easter! I’ll see you all again on Monday!

xx

– Ashley –

Easter Eats: Cookies-and-Cream Shortbread Cookies

Good Morning and Happy Monday, everyone! I hope you all had a wonderful weekend!

In my family, both immediate and extended- making the time to have occasional big, family dinners with lots of food and conversation is really important. The older everyone gets, and the more responsibilities and other commitments/engagements that come up- the harder it is to get everyone together.

We all know and understand that- which is why we treasure holidays like Thanksgiving, Christmas, Easter (and sometimes the 4th of July or Memorial Day during the Summer!) It’s when everyone can be together and eat, drink and be merry.

My mother hosts Easter at her home every year- and while she typically enjoys taking charge and putting together the menu- she never says no to any dishes anyone wants to bring with them to share. When I bring food, I typically gravitate towards appetizers (they’re so much fun!) and side dishes- but I’m also known to whip up some pretty good desserts, too.

This year, in lieu of my usual “safe desserts” like thumbprint cookies or my experimental cakes and pies- I thought I’d bring this fun spin on shortbread cookies, instead- which is a chocolate lover’s dream!

WHAT YOU’LL NEED:

FOR THE COOKIES:

  • 15 chocolate sandwich cookies
  • ½ cup (56g) confectioners’ sugar
  • 1 cup (226g) cubed unsalted butter, at room temperature
  • 2 cups (241g) all-purpose flour
  • ½ teaspoon fine sea salt
  • 1 teaspoon pure vanilla extract

FOR THE GLAZE:

  • 1 cup (113g) confectioners’ sugar
  • 2 tablespoons heavy cream

READY? HERE’S WHAT YOU DO:

  1. MAKE THE COOKIES: Preheat the oven to 300°F and line two baking sheets with parchment paper.
  2. In the bowl of a food processor, pulse the cookies until they form fine crumbs, about 1 minute. Remove 2 tablespoons of the cookie crumbs and reserve in a small bowl.
  3. Add the confectioners’ sugar to the food processor and pulse to combine. Add the butter and process until the mixture is light and fluffy, about 1 minute. Scrape the bowl of the food processor well.
  4. Add the flour and salt, and pulse until the dough comes together, about 30 seconds. Add the vanilla and process until combined.
  5. Divide the dough in half and then form each piece into an inch-thick disk. On a lightly floured surface, roll out the dough to ⅓ inch thick. Cut the dough into circles using a round fluted cookie cutter and then transfer to the prepared baking sheets.
  6. Bake until the cookies start to brown at the edges, 15 to 17 minutes. Cool completely.
  7. MAKE THE GLAZE: In a medium bowl, whisk the confectioners’ sugar and cream until a thick glaze forms. Working one at a time, spoon 1 teaspoon of glaze on top of each cookie. Let the glaze set for 5 minutes, then sprinkle the reserved cookie crumbs on top of each cookie. The glaze will fully set in another 10 to 15 minutes and then the cookies are ready to serve.

I had opted to sprinkle crumbled up sandwich cookie chunks on top of the still-setting glaze as opposed to the finely pulsed cookie crumbs I’d initially used to create the dough- since I thought it gave these a more fun look- but you can do it by the book if desired!

The result is a sweet, decadent dessert that serves as the perfect finale to a great meal! I can’t wait for my mother to see (and eat) these when I bring the next batch to her house.

And with that being said- there are lots of big changes happening at my job this week, which I’ll discuss at a later time when I have a free moment- and I’m here bright and early to get the jump on them and stay on top of things!

I’m off- but here’s wishing you all an easy start to your day and your work week!

xx

– Ashley –

Festive Foodie: Mom’s Corned Beef

Good Morning and Happy Monday, everyone!

I didn’t forget that yesterday was Saint Patrick’s Day when I posted my “Spring Cleaning” update last Friday- but when you live in Massachusetts and St. Paddy’s falls on a weekend- the party sort of extends into the days leading up to and following the actual holiday until everyone eventually gets tired/hungover and collectively decide it’s time to pack it up until next year.

Such was the case this past weekend, which consisted of plenty of Irish breakfasts, brunches, celebratory parades and green-tinted everything. While I managed to avoid overzealous college students chugging green beer and people dressed like leprechauns loudly trying to trace back their family’s lineage to Ireland (as is tradition!)– there was one thing I made it a point not to skip- and that was my mom’s annual corned beef dinner.

My family isn’t Irish enough for it to actually count- but that doesn’t mean we can’t celebrate our Irish friends with a traditional meal of meat and vegetables. I asked my mom for her recipe to share here this week- and although she doesn’t actually measure out anything (it’s all from memory!)– she was kind enough to oblige and give her best “guest-imates” on how much of everything to use.

WHAT YOU’LL NEED:

  • 1 corned beef brisket (point cut or flat cut)
  • 1 bag of red or yellow potatoes
  • 1 bag of carrots (whole or cut)
  • 1 head of green cabbage, shredded
  • 1 cup brown sugar

READY? HERE’S WHAT YOU DO:

  1. Put corned beef in a pot, and cover with water and seasoning (optional.) Boil the corned beef until fork tender.
  2. Add potatoes, carrots and cabbage. Finish boiling under vegetables are tender.
  3. Heat oven to 400°F.
  4. Take the cooked corned beef and place it in a baking pan. Sprinkle the brown sugar on top and bake until the sugar is melted and a little crispy- about 20-25 minutes.
  5. Plate the corned beef with the vegetables and serve.

Now, admittedly the cabbage went right into the garbage because, you know- cabbage is gross– but everything else was delicious! I love tender carrots and potatoes- and the brown sugar that was added to the corned beef gave it a pleasantly surprising sweetness I hadn’t expected.

I hope that all of you who celebrated yesterday are recovering smoothly and that today is as easygoing as possible for you. Naturally, I’m back at work and keeping two steps ahead of everything (or trying to, anyway!) so this morning is all about answering e-mails, voicemails, and prioritizing tasks. Living the dream as always!

Here’s wishing us all a good week ahead. I’ll be back on Wednesday with my weekend recap!

xx

– Ashley –