Summer Sweets: Peaches-and-Cream Ice Pops

Good Morning and Happy Friday, everyone!

I’ve got another long weekend ahead of me since I took this coming Monday off from work as a bit of a “personal day.” Originally, I had plans in the Cape with some friends- but it ended up not happening due to scheduling conflicts for a few of us so now I’m simply taking the day to rest, recharge- and maybe hit the beach or Ashfield Lake again.

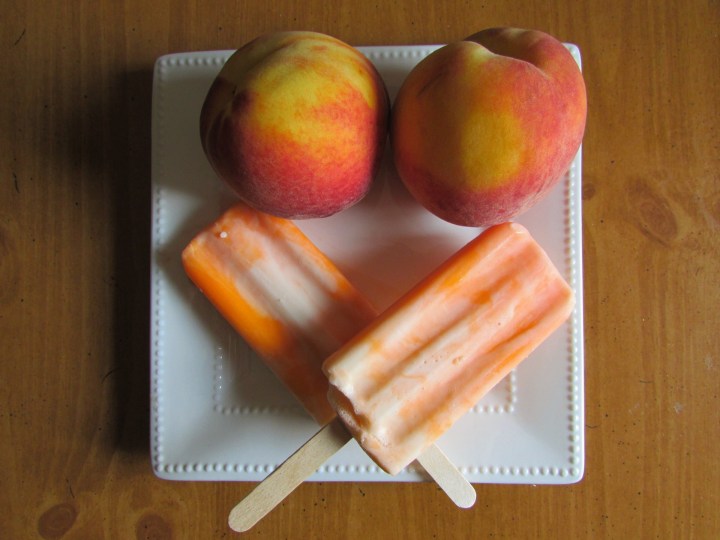
And while temperatures are soaring here in New England- I thought today would be as good a time as any to share a really delicious, super easy-to-make-and-freeze Popsicle treat for yourself and/or your guests to beat the heat with!

If you like real fruit, Greek yogurt and refreshing desserts- then you are going to *love* this recipe!

WHAT YOU’LL NEED:

  • 1 pound (453g) peaches, peeled and cut into wedges
  • ⅓ cup (66g) light brown sugar
  • ½ teaspoon ground cinnamon
  • Pinch of fine sea salt
  • 1½ cups (340g) plain Greek yogurt
  • ½ cup (112g) crème fraîche
  • 2 teaspoons pure vanilla extract
  • ¼ teaspoon pure almond extract

READY? HERE’S WHAT YOU DO:

  1. Preheat the oven to 375°F. Arrange the peaches in an even layer on a baking sheet. Add the brown sugar, cinnamon and salt; toss to combine.
  2. Roast the peaches until tender, 20 to 25 minutes. Cool for 15 minutes.
  3. In a large bowl, whisk the yogurt, crème fraîche, vanilla and almond extract to combine. Transfer about three quarters of the mixture to a container with a pour spout.
  4. Add the cooled peaches to the remaining yogurt mixture in the bowl. Use a potato masher to mash the two together (it’s okay if there are chunks of peaches left)
  5. Pour 2 tablespoons of the yogurt mixture into each ice-pop mold. Follow with 4 tablespoons of the peach mixture, then 4 tablespoons of the yogurt mixture. Continue alternating the two until the molds are full. It’s okay if the layers swirl together.
  6. Place an ice-pop stick in the center of each mold and transfer to the freezer. Freeze until solid, at least 2 hours.
  7. Run the molds under warm water and then unmold the ice pops. Keep frozen until ready to serve.

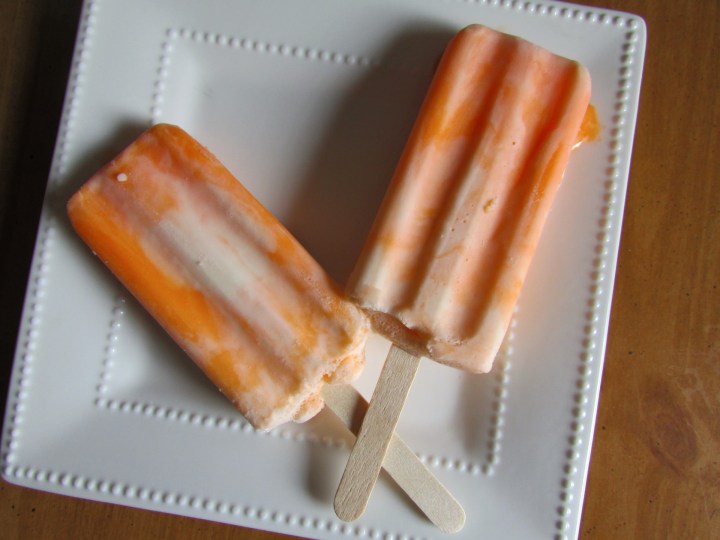
Honestly, the hardest part of this recipe was the waiting for the ice pops to freeze so I could finally enjoy one in front of my air conditioner! And, once I did- I was so relieved these tasted just as good as they looked.

I love a good ice pop this time of year- and I’m thinking I may try to incorporate pineapple or mango instead of peaches the next time I attempt this one. Something with a little more citrus and sour behind it. We’ll see how it goes!

I’m off to get some work done before I take off for the next few days- but here’s wishing you all a wonderful weekend ahead. I’ll be back- bright and early- on Monday morning. ‘Til then- have fun, wear sunscreen and stay hydrated out there!

xx

– Ashley –

Backyard BBQ Recipes: Grilled Watermelon-Feta Skewers

Good Morning and Happy Friday, everyone!

I am so excited for this weekend- not only because I need a little break from what proved to be a rather busy and hectic work-week- but also because the weather is supposed to be really nice and I’ve got a lot of outdoor stuff I want to do around the Valley!

One of those outdoorsy things may include some grilling- and I recently came across a super simple, super quick backyard BBQ recipe that combines fruit and cheese (a great pairing in itself, really)– but in a fun and unique way.

Meet watermelon and feta skewers- the Summertime recipe you didn’t know you needed in your life ’til now!

WHAT YOU’LL NEED:

  • About 40 (1-inch) pieces cubed watermelon
  • About 20 (1-inch) pieces cubed feta cheese
  • ⅔ cup extra-virgin olive oil
  • 4 cups arugula (optional)
  • 3 tablespoons balsamic vinegar
  • Coarse sea salt and freshly ground black pepper
  • ⅓ cup chopped fresh basil (optional)

READY? HERE’S WHAT YOU DO:

  1. Set your grill to high heat. Thread a piece of watermelon, a piece of feta and a second piece of watermelon onto a 6-inch skewer. Repeat with the remaining pieces of watermelon and feta.
  2. Once the grill is hot, brush the skewers on all sides with 2 tablespoons of the olive oil. Grill until lightly charred on all sides, 1 to 2 minutes per side. Remove from the grill and cool slightly.
  3. To serve, mound 1 cup arugula onto each plate and top with 5 skewers per plate. Drizzle each salad with 1 to 2 tablespoons olive oil and 2 teaspoons balsamic vinegar. Season with salt and pepper, and garnish with chopped basil. Serve immediately.

Even though the original recipe calls for some extra ingredients for presentation purposes- my skewers were well-received even without being placed on a bed of arugula or sprinkled with basil. I put them out with a little bowl of standard cream cheese fruit dip and another little bowl of vanilla Greek yogurt and my friends devoured them just the same!

The sweetness of the watermelon with the saltiness of the feta was an unexpected flavor journey as I ate a couple of these skewers myself- but it was definitely delicious and something I will absolutely make again- although I think the next time I might leave them on the grill for a little longer to get a bit more of a charred surface. I was admittedly afraid of melting the cheese too much during this go at the recipe!

That just about does it for me this week. I’ll be back on Monday with more recaps of my time around the Valley, another look at my Summer wardrobe and maybe- just maybe- a custom-made Summertime soundtrack to share! You’ll have to check back to find out!

Here’s wishing you all a sunny, safe and fun weekend ahead. Be good to yourselves and each other!

xx

– Ashley –

Summer Sweets: Frozen Strawberry Lemonade Pie

Good Evening and Happy Monday, everyone!

I hope you all had a wonderful start to your week! While my posts typically go up early in the mornings before I head into my office for the day- I was a little pre-occupied this past weekend- and with my hours changing a bit at work (I come in a little earlier, stay a little later- and have half days on Fridays now!) I didn’t have a whole lot of time to get this yummy, sweet and just the right amount of tart recipe up on the blog ’til now!

Lemonade is my go-to, non-alcoholic drink to serve during the Summertime- especially when it’s scorching hot out (which it definitely has been around New England lately!)– since it’s so refreshing when it’s made right. When I saw this strawberry-infused, set-it-and-forget-it frozen pie version a couple of weeks ago- I knew I had to try out the recipe during one of my days off to share with friends as we tried to beat the heat and stay cool!

WHAT YOU’LL NEED:

  • 12 tablespoons butter
  • 24 whole graham crackers, crushed into tiny crumbs (you should have 4 cups worth of graham cracker crumbs total.)
  • ¼ cup sugar
  • Water, as needed
  • 3 egg whites
  • Juice of 2 lemons
  • ¾ cup sugar
  • 8 ounces whipped topping, thawed
  • 16 ounces frozen strawberries, thawed

READY? HERE’S WHAT YOU DO:

  1. MAKE THE CRUST: Combine butter, crushed graham crackers, and ¼ cup sugar in a large bowl. Stir together until the mixture begins to stick together. To test the mixture, pinch a small amount at a time and see if it sticks. If it doesn’t- add a tablespoon of water at a time until it does.
  2. Divide the graham cracker crumbs between two 9 inch pie plates, using your fingers to press the mixture evenly across the bottom and up the sides. Place the crusts in the freezer while you make the fillings.
  3. MAKE THE FILLING: Place the egg whites in a clean mixing bowl. Use electric beaters or a stand mixer fitted with the whisk attachment to beat the egg whites on medium speed for 1 minute. Then add the lemon juice. Beat on medium high speed for another 4 minutes. The mixture will look foamy and thick. Add the sugar, a quarter cup at a time, and continue to beat on medium high speed for 1 minute after each addition (the eggs will take about 8 minutes total to whip up completely.)
  4. Add the frozen strawberries and beat on medium speed until they’re broken up and evenly distributed throughout the egg mixture. Fold in the whipped topping.
  5. Divide the strawberry mixture evenly between the two pie pans. Cover and freeze for at least six hours- or overnight.
  6. To serve, drop the pie plate in an inch of hot water for about 30 seconds to help loosen the crust. Then slice and serve!

I love this recipe because it’s sweet and sour- but the graham cracker crust helps break up the tartness with each bite! You can also add or reduce the amount of lemon juice and sugar incorporated into this if you want the pie to taste more sour or more sweet- depending on your personal preference. I think I’ll actually be adding a little more lemon juice next time!

Here’s to another lovely week of Summer ahead of us. We’ve already made it through Monday- so here’s hoping the rest is a breeze!

xx

– Ashley –

Summer Treats: Grilled Angel Food Cake with Blueberry Sauce

Keeping up with my theme of Summer-appropriate and grill-friendly recipes– I shifted today’s concoction from pineapples and ice cream to cake and blueberries, instead!

I love angel food cake. It’s light, fluffy, and has a hint of sweetness to it that makes it the perfect “any occasion” dessert- but it can also go from blissful to bland after a while if it’s not paired with something more flavorful- so combining it with a homemade blueberry-lemon sauce and a big dollop of freshly whipped cream sounded pretty incredible after dinner on a humid evening earlier this week.

This recipe requires minimal ingredients and takes nearly no time at all to prepare when done correctly- so if you’re in a pinch for something sweet and a little tart to serve as a post-meal treat before the Summer ends- this one will definitely come in handy!

WHAT YOU’LL NEED:

  • 1 angel food cake (store-bought or homemade)
  • 2 cups blueberries
  • Zest and juice of 1 lemon
  • 3 tablespoons granulated sugar
  • 1½ cups heavy cream
  • ⅓ cup confectioners’ sugar
  • ½ teaspoon pure vanilla extract

READY? HERE’S WHAT YOU DO:

  1. Preheat a grill or grill pan. Slice the angel food cake into 8 even wedges.
  2. Lightly grease the grates of the grill and cook the angel food cake until grill marks appear, about 2 minutes per side. Set aside.
  3. In a medium pot, combine the blueberries, lemon zest, lemon juice and granulated sugar. Heat the mixture over medium-low heat until the blueberries break down and the mixture is saucy, 12 to 15 minutes. Let cool slightly.
  4. In the bowl of an electric mixer fitted with the whisk attachment, whip the cream and confectioners’ sugar to medium peaks. Add the vanilla extract and mix to combine.
  5. Serve cake with the whipped cream and a drizzle of the blueberry sauce.

I had one slice of this and had to physically force myself not to eat about four more- it was that good. The blueberry-lemon sauce is fantastic- so much that I plan on using some that was leftover on top of a stack of waffles or pancakes tomorrow morning before I head to work- and the whipped cream had just enough of a vanilla kick to it to liven up the angel food cake when it was all scooped up together.

While no dessert is particularly “healthy”, I didn’t feel overly full or gross after I ate this. It was just the right amount of cake and toppings to keep me feeling satisfied and not sluggish- and I can’t wait to make it again!

xx

– Ashley –

Summer Treats: Grilled Pineapple Split Sundae with Cherry Sauce

Good Morning, everyone- and hello, August! Before I get to work at my office (and prepare to fight off a migraine from staring at my screen so intently for such long periods of time)– I wanted to share this quick and easy Summertime dessert recipe I recently discovered floating around the internet that I’ve been whipping up at home for guests that pop by- and for myself!

I love pretty much anything with pineapple in it, which is why I’m sort of shocked I’ve never thought to grill it before until now. Sure, I’ve cooked and baked with slices or cubes of it in the past- but to simply grill it and substitute it for a banana in a sundae/split? It never crossed my mind- but it’s a game changer!

You can use any type of ice cream you want for this recipe, too. It calls for vanilla- but I had some pineapple-coconut Häagen-Dazs (with pieces of fruit mixed in!) already inside of my freezer- and it tasted just fine with that, instead!

WHAT YOU’LL NEED:

  • 2 cups pitted and halved cherries, plus more cherries for serving
  • 1 pineapple—peeled, quartered and cored
  • ½ cup sugar
  • ¼ teaspoon pure vanilla extract
  • 1 quart vanilla ice cream (or any flavor of your choosing- I picked coconut-pineapple for this one!)

READY? HERE’S WHAT YOU DO:

  1. In a small pot, combine the cherries with the sugar and ¼ cup water over medium heat and cook until the cherries break down, 10 to 12 minutes.
  2. Remove the mixture from the heat and use a potato masher or a fork to mash it into a paste. Strain into a small bowl, stir in the vanilla and set aside.
  3. Heat a grill or grill pan over high heat. Add the pineapple quarters and cook until charred all over, about 4 minutes per side. When cool enough to handle, cut the pineapple quarters into long strips or bite-sized pieces.
  4. Scoop the ice cream into bowls and top with pineapple, fresh cherries and cherry sauce. Serve immediately.

This is such a light, tasty, sweet (and a little tangy) treat to enjoy on a hot day. The pineapple has a certain crispiness to it when it’s grilled- and if served right away the ice cream melts just enough to coat all of the wedges. You can serve the dish with as much cherry sauce and whole cherries on the side as you want- depending on your preference. I personally love a ton of them on mine!

I’m thinking when I make this again this coming weekend- I’ll include some grilled bananas and maybe some strawberries, too!

xx

– Ashley –